Tuesday, November 5, 2024

How to Build Your Own DIY Closet Organizer 1
How to Build Your Own DIY Closet Organizer 2


Materials:

Wood:
Shelving: Choose plywood, MDF, or solid wood depending on your budget and desired look.
Supports: For vertical supports and rails, consider using 1x2 or 1x4 lumber.
Hardware:
Screws: For securing the wood pieces.
Brackets: For mounting shelves.
Drawer slides: If you want to add drawers.
Hooks: For hanging clothes, bags, or accessories.
Door hinges: If you're building a closet door.
Tools:
Saw: To cut the wood to size.
Drill: For drilling pilot holes and securing hardware.
Level: To ensure shelves are straight and level.
Measuring tape: To measure and mark the wood.
Pencil: For marking the wood.
Screwdriver: To tighten screws.
Sandpaper: For smoothing out rough edges.
Optional:
Paint or stain: To personalize the look of your organizer.
Contact paper or wallpaper: To add a decorative touch to shelves or drawers.
Fabric: To create drawer dividers or other organizational features.

Steps:

1. Plan and Measure:
Determine the size and layout of your closet organizer. Consider the available space and your storage needs.
Measure the dimensions of your closet and create a detailed diagram or sketch.
Decide on the number of shelves, drawers, and other features you want to incorporate.

2. Cut the Wood:
Cut the wood for the shelves, supports, and any other elements based on your measurements.
Use a saw to accurately cut the pieces to size.
Sand down the edges and any rough surfaces for a smooth finish.

3. Assemble the Organizer:
Attach the vertical supports to the back wall of the closet.
Use screws and level the supports to ensure they are plumb and straight.
Attach the horizontal rails to the supports to create the framework for the shelves.
Secure the shelves to the brackets and position them at the desired heights.
Consider adding drawer slides and installing drawers as needed.
Attach hooks to the walls or supports for hanging items.

4. Add Finishing Touches:
Paint or stain the organizer to match your existing decor.
Line the shelves with contact paper or wallpaper for a decorative touch.
Add fabric dividers or other organizational features to keep your closet tidy.

Tips:

Use sturdy wood: Choose high-quality plywood or solid wood for durability.
Pre-drill holes: Drill pilot holes before securing screws to prevent wood splitting.
Consider ergonomics: Position shelves and hanging rods at a height that is comfortable for you.
Maximize storage: Utilize every inch of space with clever storage solutions.
Keep it organized: Use bins, baskets, or other containers to separate and categorize items.

Remember:

This is just a general guide. Adjust the design and materials according to your specific needs and preferences.
Safety first! Wear safety glasses and gloves when using power tools.
Have fun and enjoy the process of creating a custom closet organizer that meets your specific storage needs!

DIY Woodworking Projects to Create a Personalized Home Bar 1
DIY Woodworking Projects to Create a Personalized Home Bar 2


From simple to complex, these woodworking projects will help you build the perfect bar for your home:

1. Simple and Stylish:

Floating Shelves: Use plywood or reclaimed wood to create a set of shelves for showcasing your liquor bottles and glassware.
Wine Rack: A simple wine rack can be built using basic cuts and joinery techniques. Use scrap wood for a rustic look or purchase pre-cut pieces for a cleaner finish.
Bar Cart: A mobile bar cart is a great way to add storage and style to your home bar. Use pre-made wheels and a simple frame construction for a quick build.
Wall-Mounted Bottle Holder: A simple and space-saving way to display your favorite bottles. Use a single piece of wood and drill holes for different bottle sizes.

2. Functional and Practical:

Bar Top: Create a custom bar top using a sturdy piece of wood like maple, oak, or cherry. Finish with a bar top varnish for durability.
Bar Backsplash: Add a decorative element and protect your wall with a wood backsplash behind the bar. Consider using tile-like pieces of wood for a unique look.
Under-Cabinet Storage: Maximize space under your bar with custom-built shelves, drawers, and storage units.
Cutting Board: A large wooden cutting board can double as a serving tray and a decorative element. Use a butcher block wood for durability and style.

3. Unique and Personalized:

Custom-Shaped Bar Top: If you're feeling ambitious, create a custom bar top shaped to fit your space perfectly. Use a CNC router for intricate designs.
Etched or Engraved Bar Sign: Add a personal touch with an etched or engraved sign featuring your name, a quote, or a special design.
Reclaimed Wood Bar: Give your bar a rustic and unique character by using reclaimed wood for the construction.
Built-in Bar: For a truly custom look, design and build a built-in bar that integrates seamlessly into your space.

Tips for Successful DIY Woodworking Projects:

Plan your design: Create detailed drawings and sketches before starting.
Choose the right materials: Select wood that's suitable for your project and finishes.
Use proper tools and techniques: Invest in good quality tools and learn the basics of woodworking.
Take your time: Rushing can lead to mistakes, so take your time and enjoy the process.
Safety first: Always wear safety gear and follow safety guidelines when using power tools.

Bonus Ideas:

Upcycle old furniture: Transform an old dresser, desk, or bookshelf into a stylish bar.
Use pre-made kits: Many kits are available for building simple bars and bar carts.
Get creative: Use your imagination and woodworking skills to create a unique and personalized home bar that reflects your style.

Enjoy the process and have fun building your dream home bar!

Upgrade Your Living Room with These DIY Woodworking Coffee Table Ideas 1
Upgrade Your Living Room with These DIY Woodworking Coffee Table Ideas 2


Want to add a touch of rustic charm or modern elegance to your living room? Look no further than a DIY woodworking coffee table! These projects are surprisingly achievable, even for beginners, and offer a chance to showcase your creativity and save money.

Here are a few ideas to get you started:

Rustic & Industrial:

Reclaimed Wood Coffee Table: Use salvaged wood planks or pallets to create a unique and sustainable table. You can leave the wood natural or stain it for a more polished look.
Live Edge Coffee Table: Showcase the beauty of natural wood with a live edge slab. Find a local lumberyard or sawmill that specializes in live edge wood for unique and eye-catching options.
Industrial Pipe Coffee Table: Combine reclaimed wood with industrial pipe fittings for a sleek and modern aesthetic.
X-Frame Coffee Table: This simple design utilizes a sturdy X-frame base and a wood top, perfect for showcasing your crafting skills.

Modern & Minimalist:

Floating Coffee Table: Create a minimalist look with a floating table design. You can use wood, metal or even a combination of both materials.
Geometric Coffee Table: Play with geometric shapes and angles to create a bold and modern table. You can use plywood, MDF, or even pre-made geometric shapes for a faster project.
Mid-Century Modern Coffee Table: Incorporate classic mid-century modern design elements like tapered legs, rounded edges, and simple lines.

Tips for Success:

Plan ahead: Sketch your design, calculate the materials needed, and choose the right tools.
Sand carefully: Ensure a smooth finish by sanding the wood thoroughly.
Use quality materials: Invest in good quality wood and hardware for a durable and long-lasting coffee table.
Finish with style: Choose a stain or paint that complements your existing furniture and decor.

Beyond the Design:

Add storage: Incorporate drawers, shelves, or a lift-top design for practical storage solutions.
Get creative with the legs: Use interesting materials like metal, rope, or even repurposed items for unique and stylish legs.
Add personalization: Engrave your initials or a special message onto the table for a personalized touch.

Ready to begin your woodworking journey?

You can find detailed instructions and tutorials for any of these designs online. Remember, woodworking is about learning and having fun. Don't be afraid to experiment and make your own unique creations!

DIY Woodworking Projects for a Rustic Cabin Feel 1
DIY Woodworking Projects for a Rustic Cabin Feel 2


Here are some DIY woodworking projects that will bring that cozy, rustic cabin vibe to your home:

Simple and Functional:

Rustic Wall Shelves: Build simple shelves using reclaimed wood or rough-cut lumber. Leave the edges rough and natural for a truly rustic feel. Add metal brackets for a modern touch.
Wooden Coat Rack: Use thick branches or salvaged wood to create a unique and functional coat rack. Securely attach to the wall using sturdy hooks.
Log Candle Holders: Cut logs into various sizes and drill holes for candles. Use natural bark for a rustic look.
DIY Wooden Utensil Holder: This can be as simple as a small bucket or a wooden box with dividers for easy access to your kitchen tools.
Rustic Picture Frames: Use reclaimed wood or branches to create unique frames for your favorite photos. Add twine or leather straps for hanging.

More Involved Projects:

Rustic Coffee Table: Use rough-cut lumber to build a sturdy coffee table with a live-edge top for a truly natural feel.
DIY Wooden Bench: Construct a simple bench with a wide, comfortable seat using salvaged lumber or thick planks. Leave the edges rough for a rustic aesthetic.
Reclaimed Wood Mirror: Find a vintage mirror and frame it with reclaimed wood or salvaged planks. This creates a statement piece for your cabin-style space.
Rustic Wine Rack: Use repurposed wood or branches to create a unique wine rack that displays your favorite bottles.
Log Bed Frame: For a truly rustic experience, build a bed frame with logs as the headboard and footboard. This takes more time and effort but creates a stunning statement piece.

Tips for a Rustic Look:

Embrace Imperfection: Don't worry about perfect finishes. Knots, cracks, and imperfections add character to your projects.
Reclaimed Wood: Use reclaimed wood whenever possible for a truly authentic rustic look.
Natural Finishes: Opt for natural finishes like beeswax or oil to highlight the wood's beauty and texture.
Rustic Hardware: Choose hardware that complements the rustic feel, such as leather straps, metal buckles, or wrought iron accents.
Add Natural Elements: Incorporate natural elements like branches, moss, or stones into your projects.

Remember: These projects are just starting points. Get creative and personalize them to fit your style and space. Enjoy the process of creating something unique and beautiful for your home!

Make Your Own DIY Wooden Coasters: A Step-by-Step Guide 1
Make Your Own DIY Wooden Coasters: A Step-by-Step Guide 2


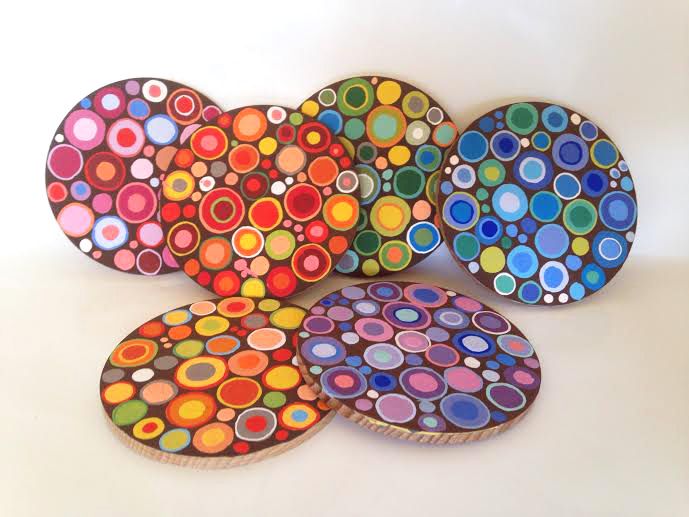
Adding a touch of warmth and personality to your home is easy with these DIY wooden coasters. This project is perfect for beginners and can be customized to fit your style!

Materials:

Wood: You can use scrap wood, plywood, or pre-cut coasters. We recommend a thickness of 1/4 inch for best results.
Sandpaper: Different grits (80, 120, 220) for sanding the wood.
Wood stain (optional): Choose your desired color and finish.
Polyurethane (optional): For a protective sealant.
Cork sheet (or felt pads): For the non-slip bottom.
Scissors or utility knife: For cutting cork sheet.
Measuring tape: For accurate measurements.
Pencil: For marking the wood.
Drill with a 1/4-inch drill bit: For creating holes for cork.
Wood glue: For attaching cork.
Clamps: For holding pieces together while glue dries.
Optional: Decorative elements like paint, stencils, or fabric for adding a unique touch.

Step 1: Prepare the Wood

1. Cut the wood: If you’re using a piece of wood, cut it into 4-inch square pieces (or your desired size).
2. Sand: Start with 80-grit sandpaper to smooth out rough edges. Progress to 120-grit for a finer finish, and finally 220-grit for a smooth, polished surface.

Step 2: Stain and Seal (Optional)

1. Stain: If desired, apply a wood stain according to the manufacturer's instructions. Let it dry completely.
2. Seal: For added protection and durability, apply a coat of polyurethane. Follow the manufacturer’s instructions for drying time.

Step 3: Create the Non-Slip Bottom

1. Measure and cut: Cut cork sheet into squares slightly smaller than your wood pieces. This will leave a small border of wood around the cork.
2. Drill holes: Using a drill bit, create small holes in the wood around the edges of the cork sheet (around 1/4 inch apart). These holes will help with glue adhesion.

Step 4: Attach the Cork

1. Apply glue: Apply wood glue to the back of the cork squares and around the holes in the wood.
2. Position the cork: Carefully place the cork squares onto the wood, ensuring it is centered.
3. Clamp: Use clamps to hold the cork in place while the glue dries.

Step 5: Add Decorative Touches (Optional)

1. Paint: If desired, paint your coasters using acrylic paints or other decorative paints.
2. Stencils: Use stencils to create patterns or designs on the coasters.
3. Fabric: Glue fabric squares onto the coasters for a unique and textured look.

Step 6: Let the Glue Dry

Leave the coasters clamped for several hours to allow the glue to dry completely.

Step 7: Enjoy Your DIY Wooden Coasters!

Now you have stylish and personalized coasters to protect your surfaces and add a unique touch to your home decor.

Tips:

Use a protective mask when sanding and working with wood.
Clean up any spills immediately.
Avoid exposing your coasters to extreme temperatures.
Get creative! There are endless possibilities for customizing your wooden coasters.

DIY Woodworking Projects to Give Your Home a Vintage Vibe 1
DIY Woodworking Projects to Give Your Home a Vintage Vibe 2


1. Repurposed Pallet Coffee Table:

Materials: Old pallet, wood stain, sandpaper, wood glue, screws, casters (optional).
Instructions: Disassemble the pallet, sand and stain the boards. Glue and screw together to create a table top. Add legs or casters for a finished look.

2. Vintage-Style Wall Shelves:

Materials: Scrap wood, brackets, wood stain, sandpaper, screws.
Instructions: Cut wood to desired sizes for shelves. Sand and stain the wood. Attach brackets to the wall and mount the shelves.

3. Rustic Wooden Mirror Frame:

Materials: Wood boards, wood stain, mirror, nails, hammer, saw.
Instructions: Cut wood to create a frame around the mirror. Sand and stain the wood. Nail the frame to the mirror.

4. Upcycled Ladder Bookcase:

Materials: Old ladder, wood planks, wood stain, screws, sandpaper.
Instructions: Sand and stain the ladder and wood planks. Screw the planks to the ladder rungs to create shelves.

5. Distressed Wooden Sign:

Materials: Wood plank, wood stain, sandpaper, paint, stencil (optional).
Instructions: Cut wood to size, sand and stain. Apply paint and distress for a vintage look. Add a stencil for a personalized touch.

6. Handmade Wooden Jewelry Box:

Materials: Plywood or hardwood, hinges, wood glue, sandpaper, wood stain, decorative elements (optional).
Instructions: Cut and shape the wood for the box. Sand, stain, and assemble the box using wood glue and hinges. Decorate with inlays, paint, or other embellishments.

7. Farmhouse-Style Wooden Tray:

Materials: Wood boards, wood stain, wood glue, screws, handles (optional).
Instructions: Cut wood to desired dimensions for the tray base and sides. Sand, stain, and assemble the tray using wood glue and screws. Attach handles for added functionality.

8. Reclaimed Wooden Picture Frame:

Materials: Reclaimed wood planks, saw, sandpaper, wood glue, glass, picture backing.
Instructions: Cut wood planks to create a frame. Sand and assemble the frame using wood glue. Attach the glass and picture backing.

9. DIY Wooden Crate Storage Boxes:

Materials: Wooden crates, sandpaper, wood stain, paint (optional), handles (optional).
Instructions: Sand, stain, or paint the crates. Add handles for easier carrying. Use the crates for storage, as plant containers, or as decorative elements.

10. Rustic Wooden Coat Rack:

Materials: Branches, wood stain, sandpaper, mounting hardware.
Instructions: Clean and sand the branches. Stain the branches and mount them to the wall using screws or hooks.

Bonus Tip: Don’t be afraid to experiment with different woods, stains, and finishes to create a unique vintage look for your home.